Check Point is one of the leading security solution providers. Today in this lesson, we will know How to Install Check Point Firewall Gaia R80.20. We will be installing Check Point Gaia 80.20 in VMWARE workstation v15. So, let’s get started.
First of all, you need to download Gaia R80.20. To download, you need to have appropriate permission. My current company is a Check Point partner, so i am good to go for the download.
Installing Gaia R80.20:
Now, create a VM using the downloaded image. Before going forward, you are advised to check release note to get an idea about minimum requirements.
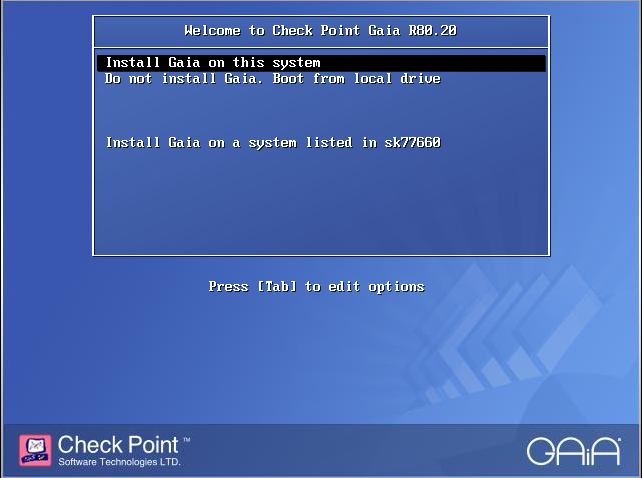
To install the Check Point Gaia, select “Install Gaia on this system” and press ENTER.
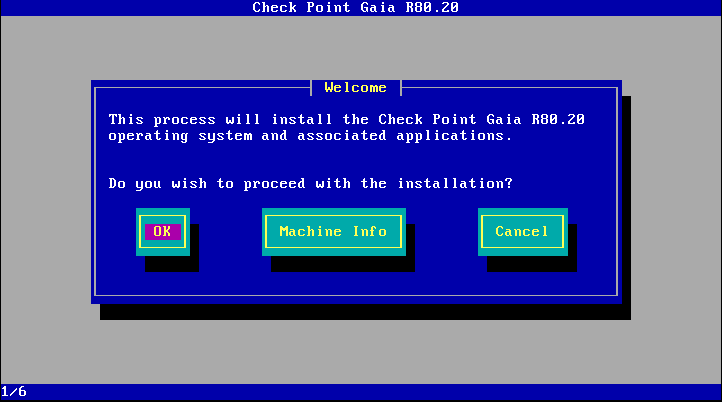
After selecting the Gaia install, you need to complete total six (6) steps to complete the process.
Steps in CLI (Wizard):
STEP #1: A “Welcome” window will open and you have to confirm the installation.
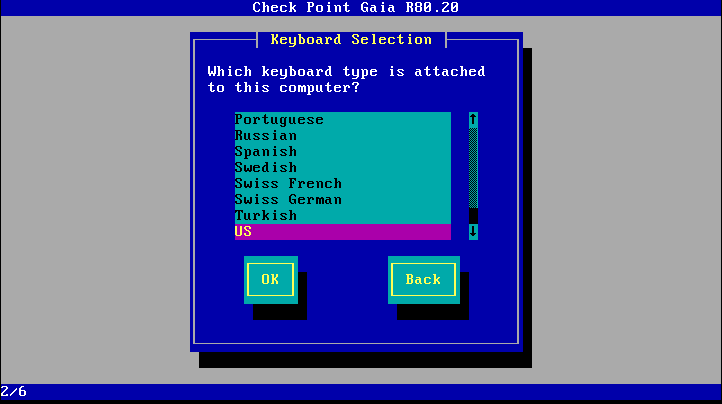
STEP #2: Choose your keyboard type. I am choosing US as my keyboard type.
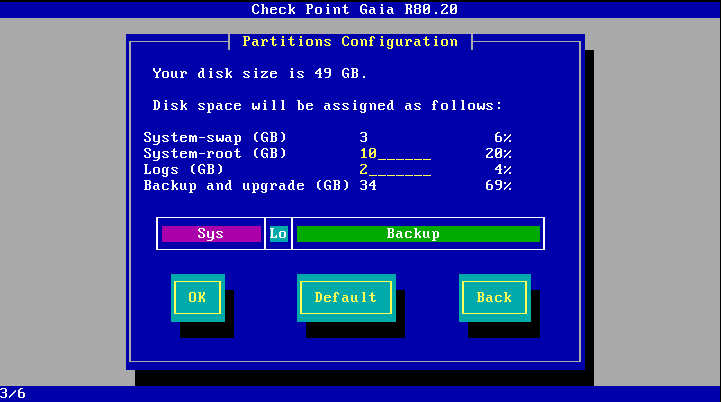
STEP #3: This section is for disk partition ratio. I am OK with default segmentation ratio. However, you can change it according your own requirement. Before changing it, you are advised to check the release note for minimum requirement for each section.
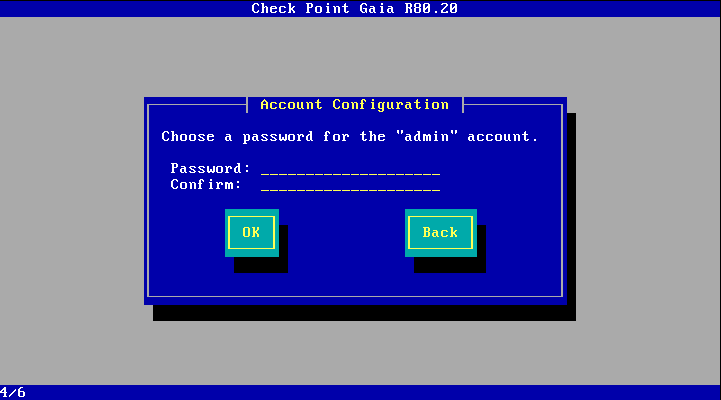
STEP #4: Put the admin password.
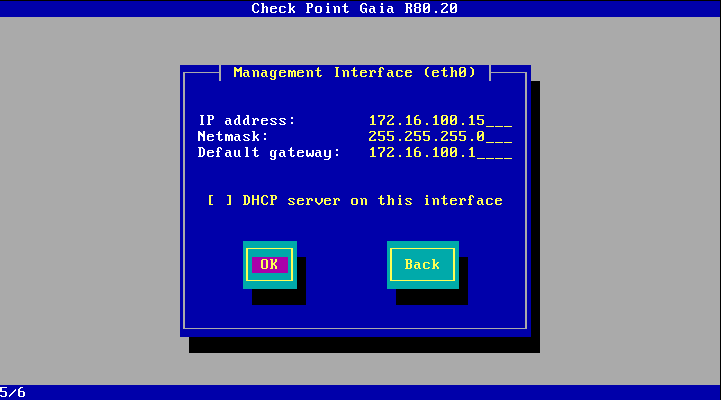
STEP #5: In this section you have to select management interface. My laptop is logically connected with “eth0“, so eth0 is our management interface and we are putting IP address for it.
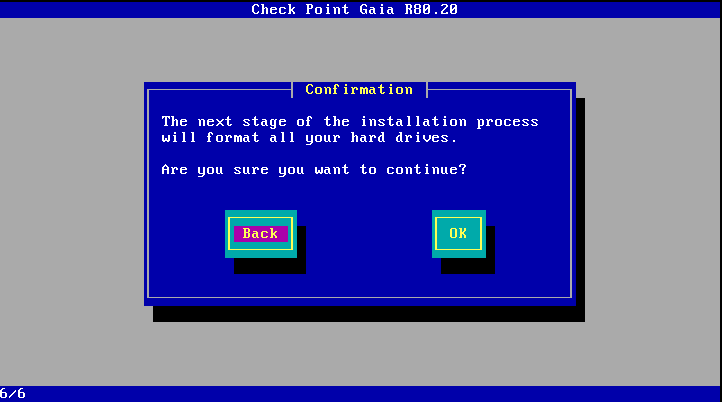
STEP #6: Now confirm to complete all the section and move forward.
After completing all the steps, open a browser to visit management IP. It will ask to acknowledge the certificate and you must agree to move forward. Login the GUI portal using the admin and the given password.
Steps in Web GUI (Wizard):
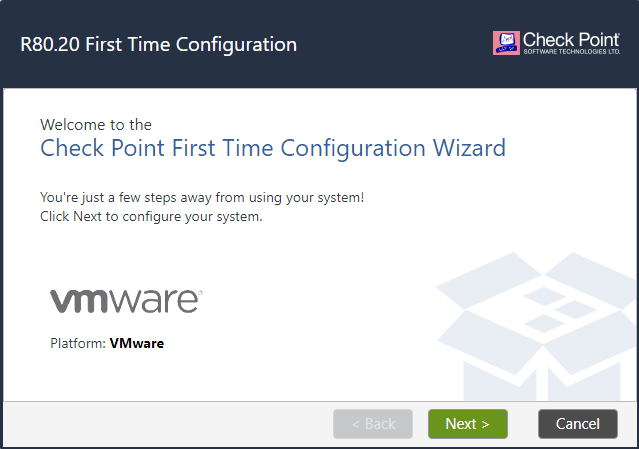
Now, First Time Configuration Wizard will open and click NEXT to continue.
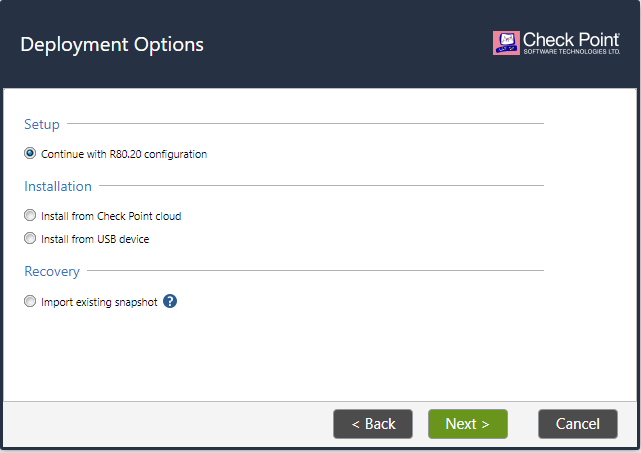
Deployment Options window will open. I am choosing the first option for clean setup.
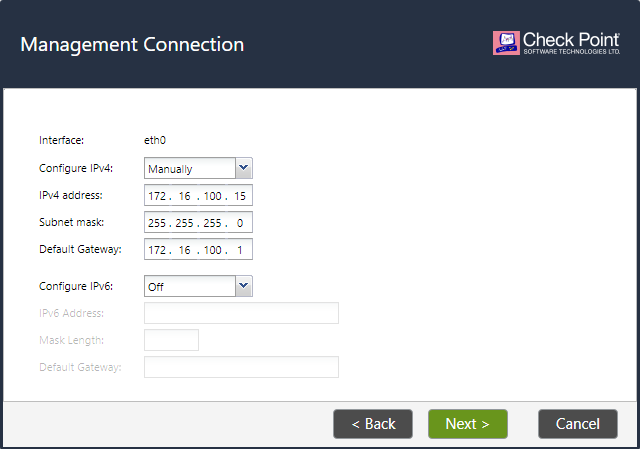
Now, time to configure/check “Management Connection“. IPv4 is already configured and no plan to go for IPv6, so i am going to click NEXT to continue.
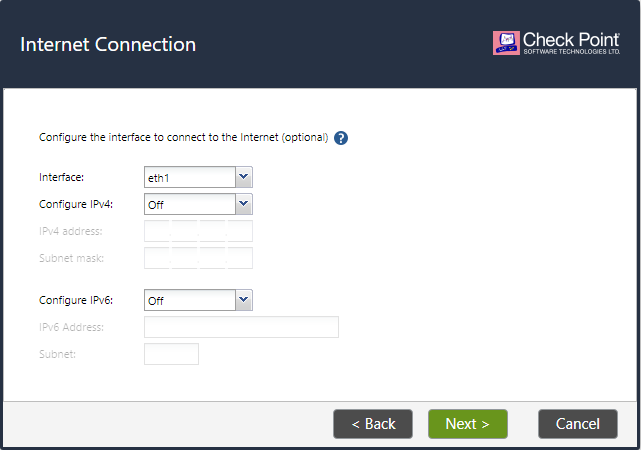
We do not need internet connection right now. So, i am going to skip this part, by clicking NEXT.
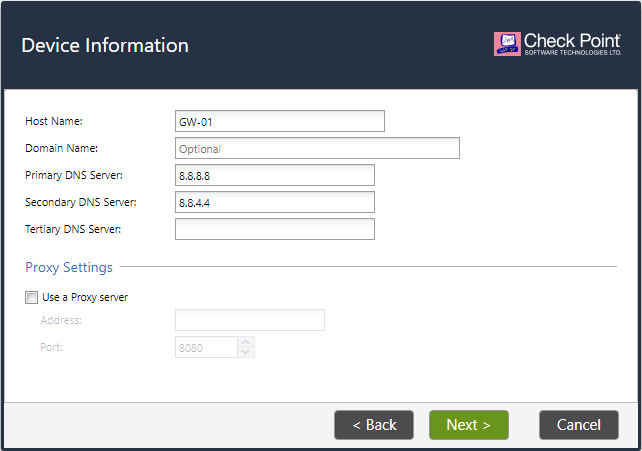
Now, we put hostname and DNS in “Device information” section. We are using Google free DNS.
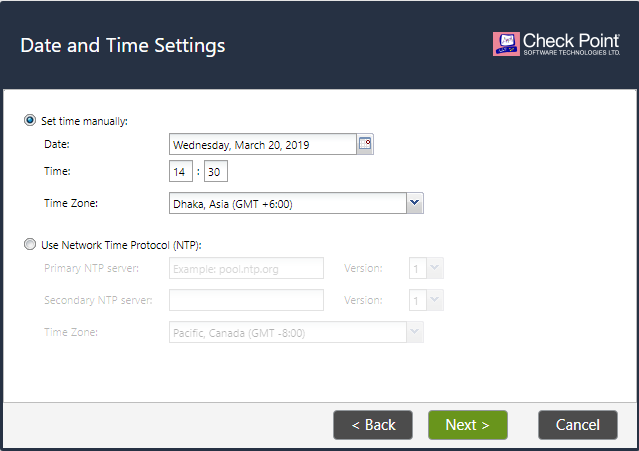
In “Date and Time Settings” section we are using manual time. If you want, you can use NTP server.
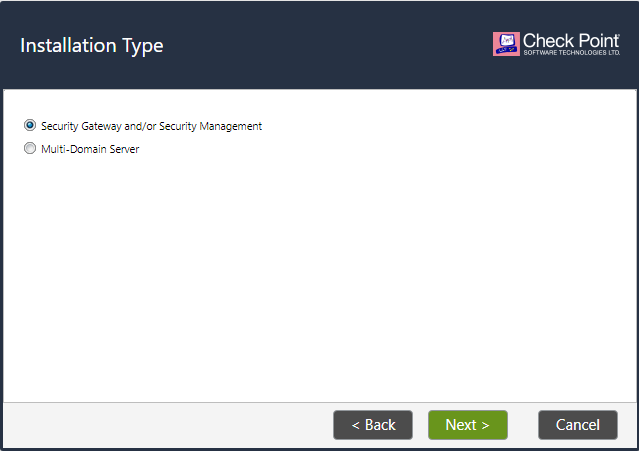
In next section, we will select installation type. We are selecting “Security Gateway and/or Security Management” as per our plan.
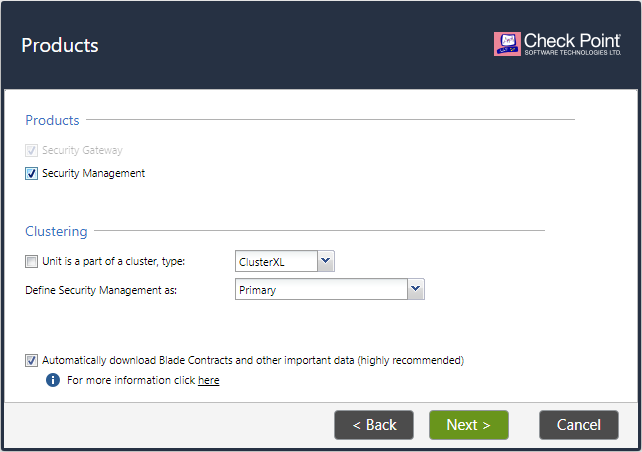
We want to make our devices gateway and management at the same time. So, we are choosing both in next “Products” section. We are not doing the cluster, so we are leaving Custer section untouched.
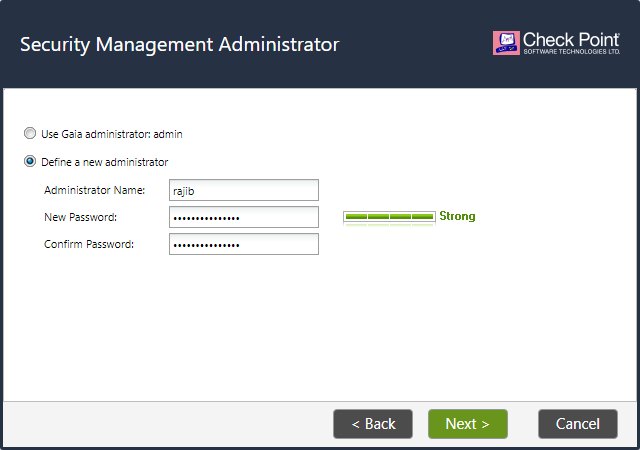
In next section, we are creating a new administrator account.
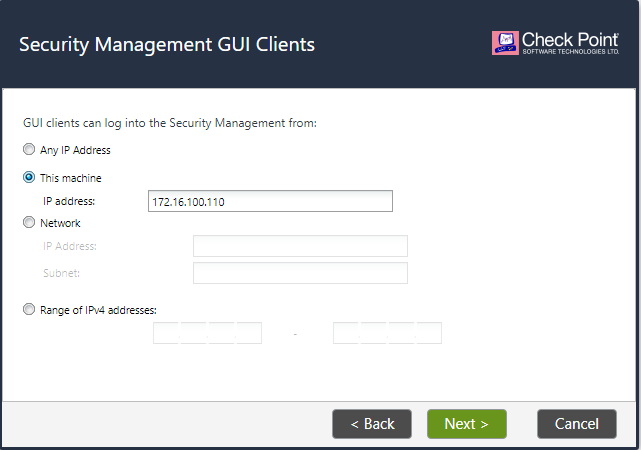
In next section, we have option to limit GUI management access. I am selecting my PC only for the login.
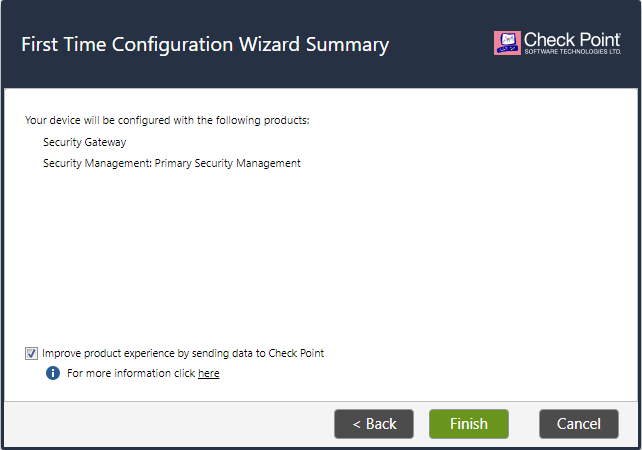
In final section, a summary will be shown for verification. Click Finish if everything is OK.
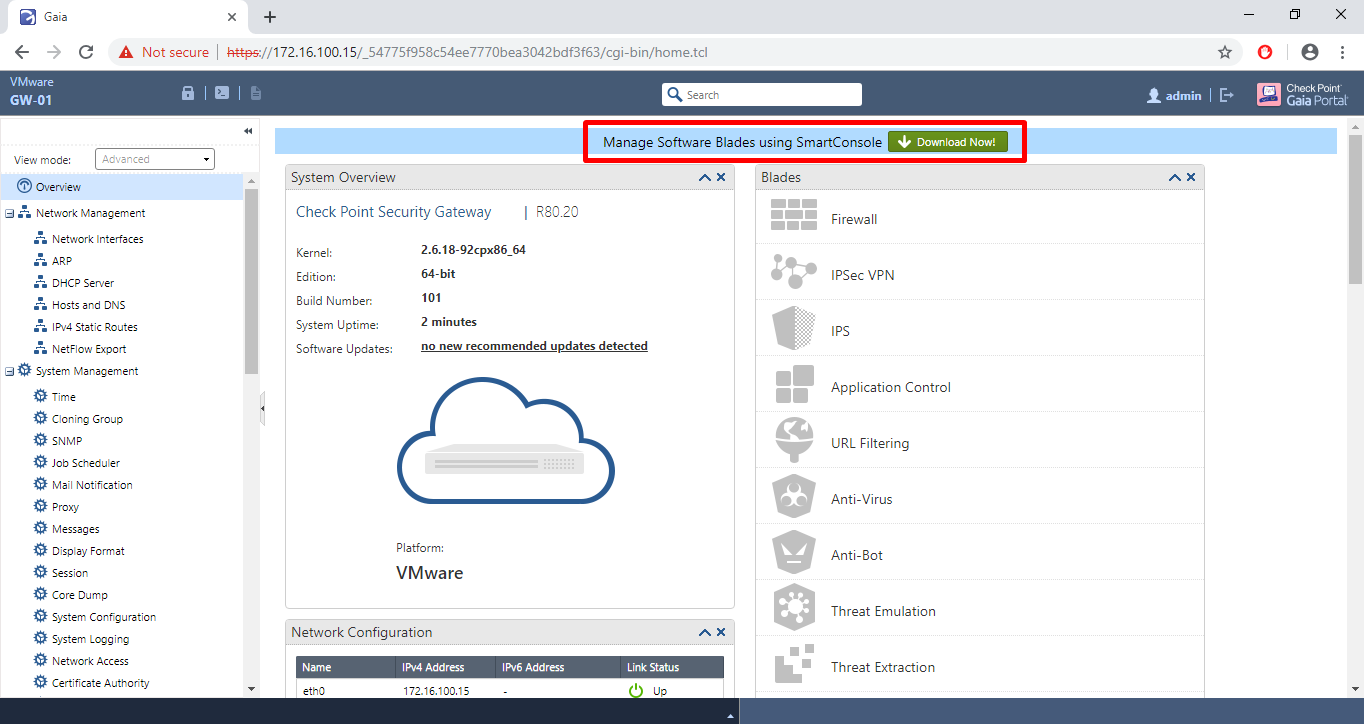
Installation will begin. It will take few minuets to complete. After completing the installation, you need to download SmartConsole for management. You can download it by login the firewall.
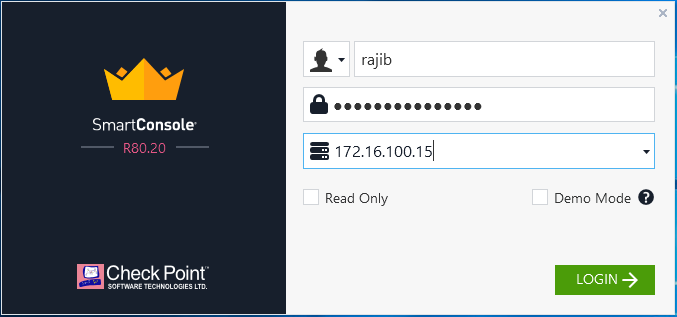
Finally, login through SmartConsole using new administrator account.
After login, it will show a fingerprint to make sure we are connected to the right device. You can verify it from CLI.
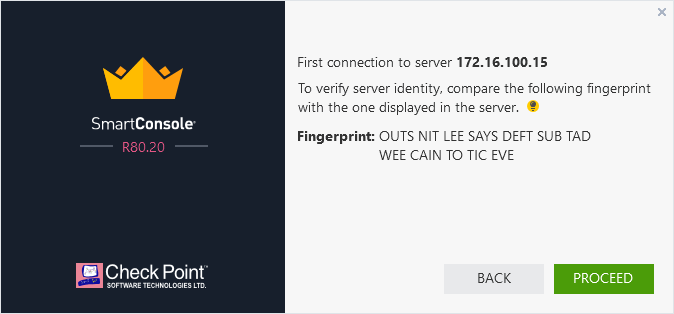
To verify the fingerprint, login to CLI. And follow following steps.
Use command cpconfig and choose option 8 as per below image.

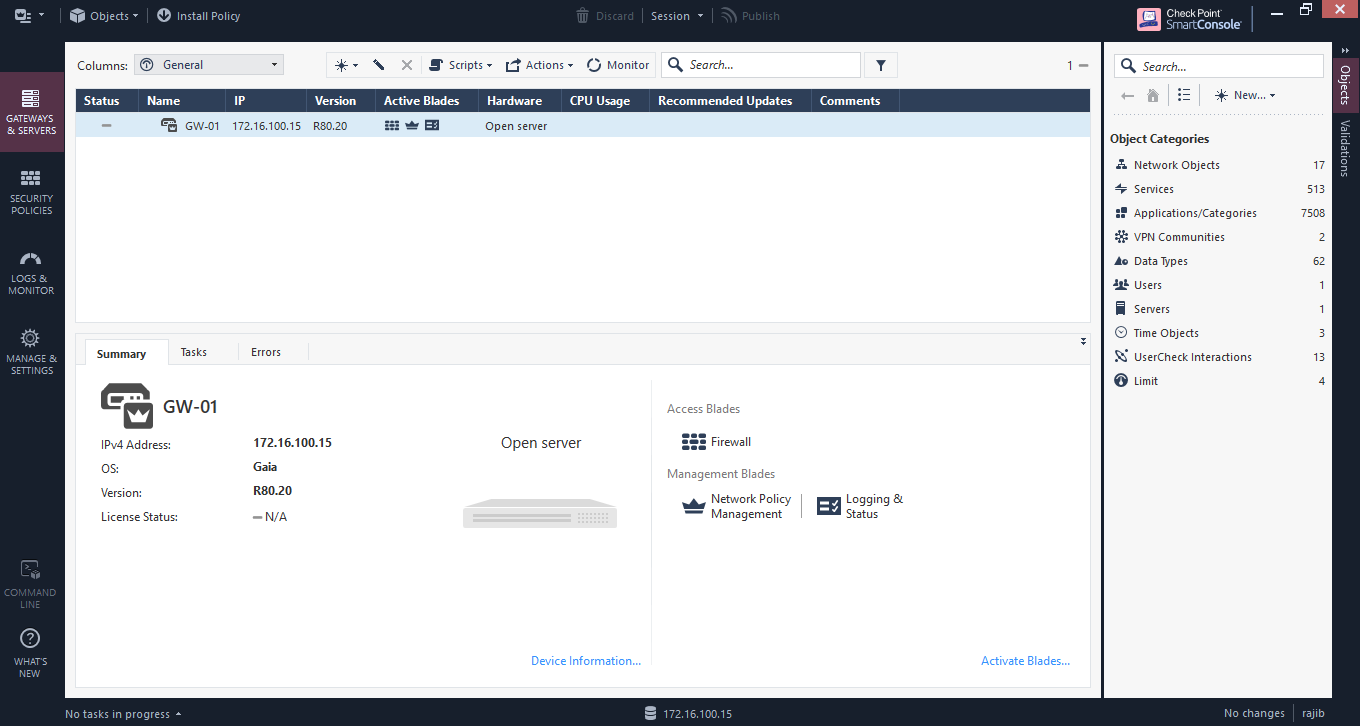
Both “fingerprint” are same, so we are good to Proceed. It will launch all the applications one by one.
This is the how to install CheckPoint Gaia R80 in VMWARE environment. Let me know if you are facing any issue to install.
I downloaded smart console but when I am login in to smart console it shows me unable to connect server who should I resolve that problem please help
Hey Manjusha, share full error messages.
You will have a download site for the iso check point R80.20, at the check point site, it is no longer available
Hi, you can use https://supportcenter.checkpoint.com/supportcenter/portal?eventSubmit_doShowupgradewizard to download your desire version.