URL Filtering on Palo Alto firewall, is a feature to block or allow HTTP and HTTPS traffic based on URL(s) and/or category. In this lesson, we will learn to configure URL Filtering on Palo Alto Networks Firewall. Let’s get started.
Check List:
License: For URL filtering, license is not mandatory. You need a license (PAN-DB URL Filtering or BrightCloud URL Filtering) only if you want to use pre-defined URL categories. If you do not have a license or license expired, your custom category will still work.
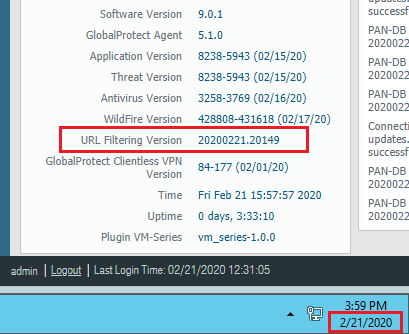
Update: You need to make sure you have updated version of URL filtering (if you have a license). To check it’s updated or not, you need to go to the Dashboard and check URL Filtering Version in General Information section. Name of Version will start with the date of same day just like below. In my case, it’s 21-Feb-2020 (20200221). So, in my case, it’s updated. If it is not updated, then go Device >> Dynamic Updates and update accordingly.
URL Filtering on Palo Alto:
URL filtering configuration will be done in few simple steps. These are-
- URL Filtering Profile
- Access Control
- Add Profile in Policy
URL Filtering profile
Firstly, to create URL filtering profile, you need to go Objects (1) >> URL Filtering (2). It’s recommended to clone default profile and change as per your requirement. The default URL Filtering profile in Palo Alto, blocks the abused-drugs, adult, command-and-control, gambling, grayware, hacking, malware, phishing, questionable, and weapons URL categories. Now select the default (3) profile and click Clone (4) and then click OK (5).
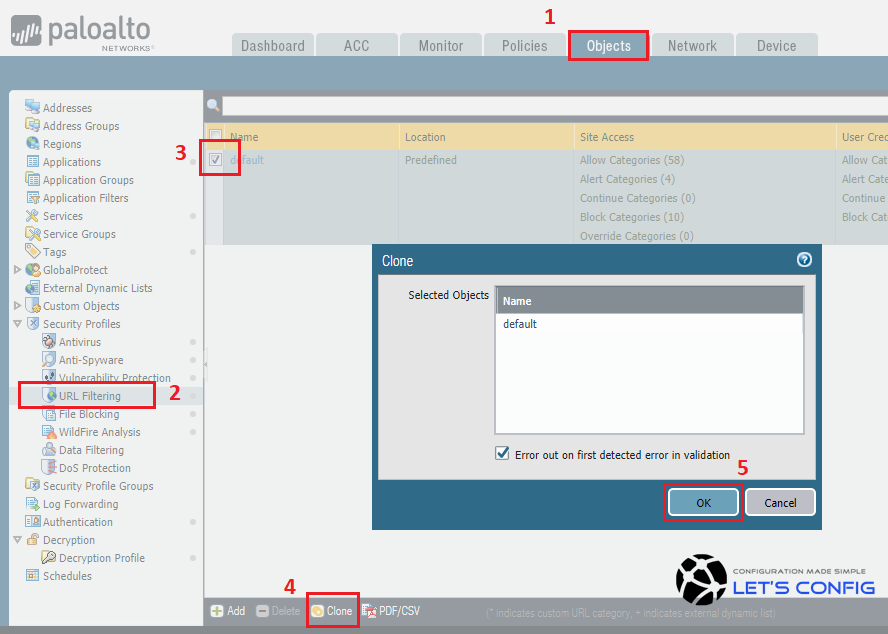
The newly created profile will be named as the default-1. You should change default name and in my case i named it as OUR-URL-FILTERING-PROFILE.
Access Control
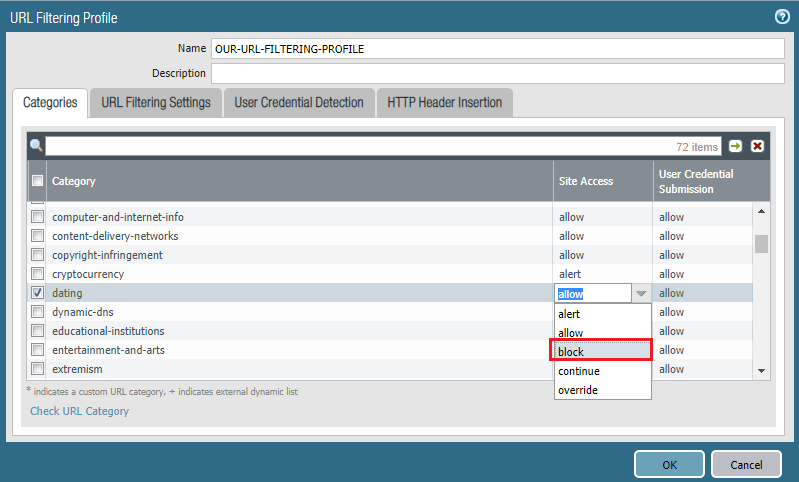
If you want to block a particular category, just select that category and in Site Access of that category, click allow to block. In our case, dating website is not permitted, so we will block it as per below.
Add Profile in Policy
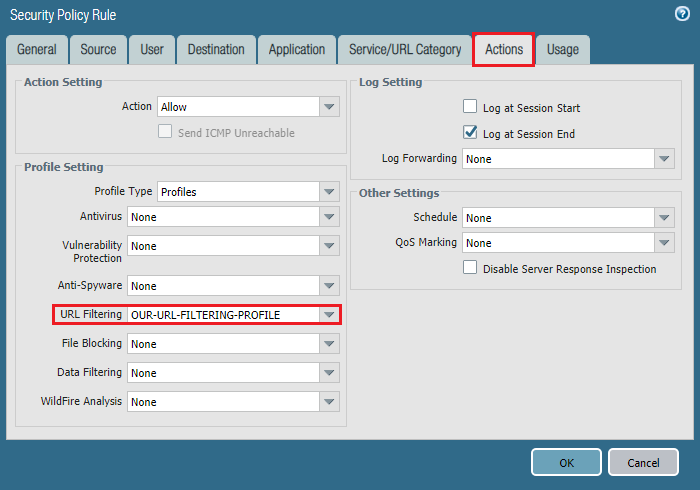
Now, you need to add URL filtering profile in policy. To do that, we need to go Policies >> Security and click on your desired policy. Go to Actions of that policy, then Policy Setting and select Profile Type as Profiles. Now, add URL Filtering profile just like below-
Finally Commit your changes.
Verification:
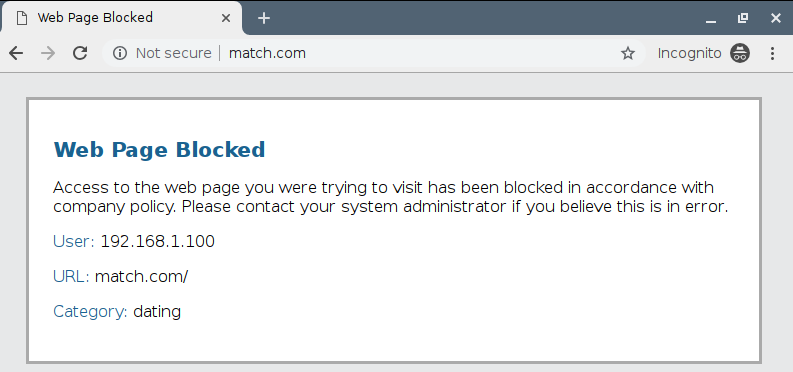
To verify, you can simply try to browse any dating site (example, match.com). It will show below response page.
Blocking a Individual URL:
So far, we have worked with full category. But, what will happen, if you want to block an individual URL. For example, you want to block Facebook.com but want to open other Social Networking website like twitter.com and linkedin.com. So, you can’t block full category here. If you want to check category of a site, then visit https://urlfiltering.paloaltonetworks.com.
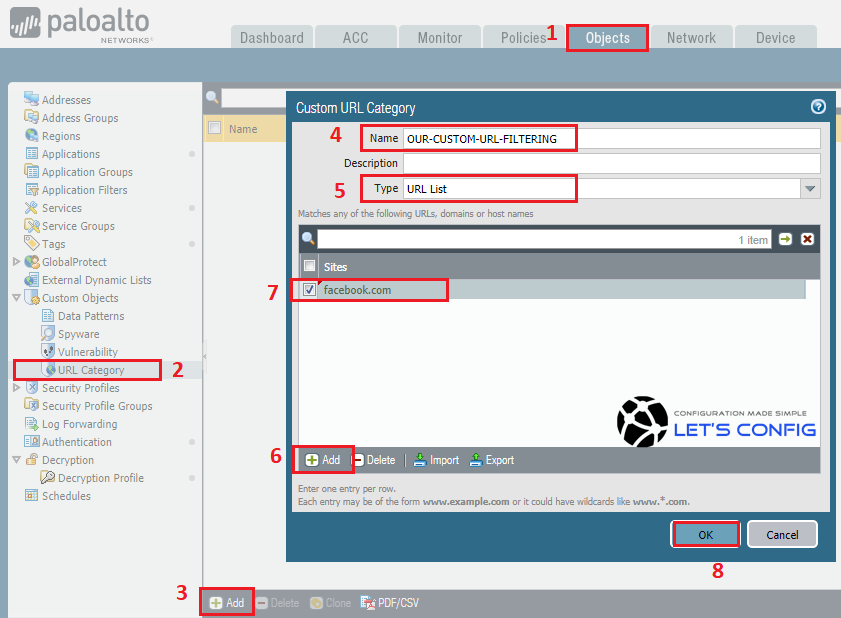
To block an individual website, you need to go Objects (1) >> URL Category (2). Now add a new Custom URL Category by clicking Add (3). Name the category, i named it OUR-CUSTOM-URL-FILTERING (4). Select URL List (5) as a type. Click Add (6) and add Facebook.com (7) as a site for this custom category and click OK (8).
Now, you need to go Objects >> URL Filtering >> OUR-URL-FILTERING-PROFILE. You will be able to see a new Custom category like below-
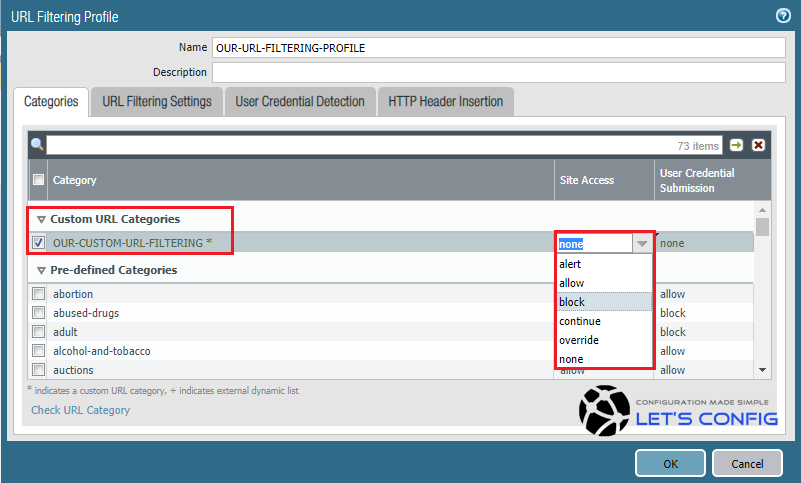
Select block and hit OK.
Changing Response Page:
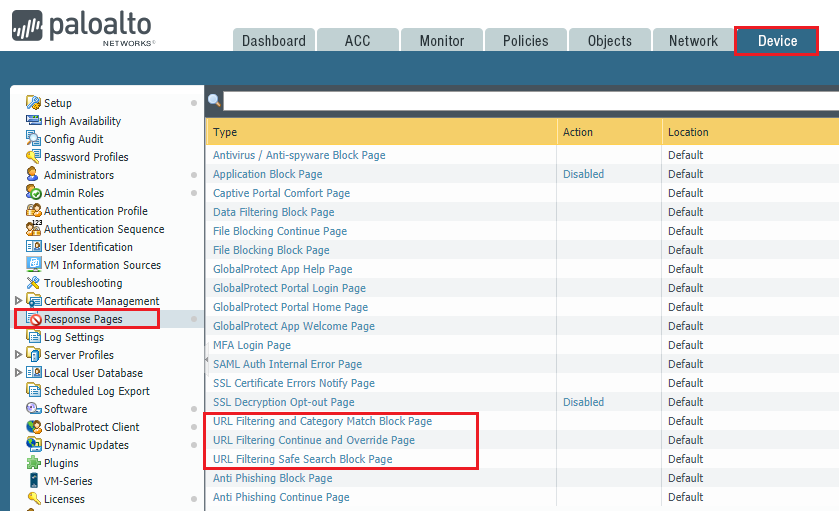
You also can modify response page for URL filtering. To change the response page, you need to go Device >> Response Pages. You can add your own html webpage as response page.
Hope, you enjoyed :).