User-ID on Palo Alto Firewall is a feature which helps to integrate an active directory with Palo Alto to map username with user activity instead of only IP address. In this lesson, we will learn to enable User-ID on Palo Alto Firewall. So, let’s get started.
User-ID configuration will be done in below steps-
- Create Server and Authentication Profile
- Configure User Identification
- Enable User-ID on Zone
Create Server and Authentication Profile
I already have a blog post on this. So, first of all, you need to configure according below –
How to configure LDAP Authentication on Palo Alto Firewall.
Configure User Identification
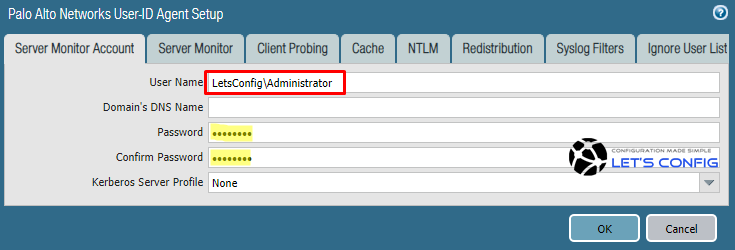
For User Identification, you need to go Device >> User Identification. From user identification pages, you need to modify Palo Alto Networks User-ID Agent Setup by clicking gear button on top-right comer.
-> In Server Monitor Account section, add your username with the domain and its password.
-> On Server Monitor tab on the same window, enable session by checking Enable Session option.
-> Also you can enable Probing from Client Probing and Enable User Identification Timeout from Cache tab.
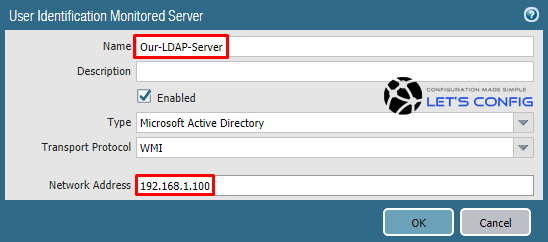
Now, you need to add server monitoring configuration. To do that, click on Add from Server Monitoring section. In my LAB, i name it as Our-LDAP-Server and add the IP address of AD server, which is 192.168.1.100.
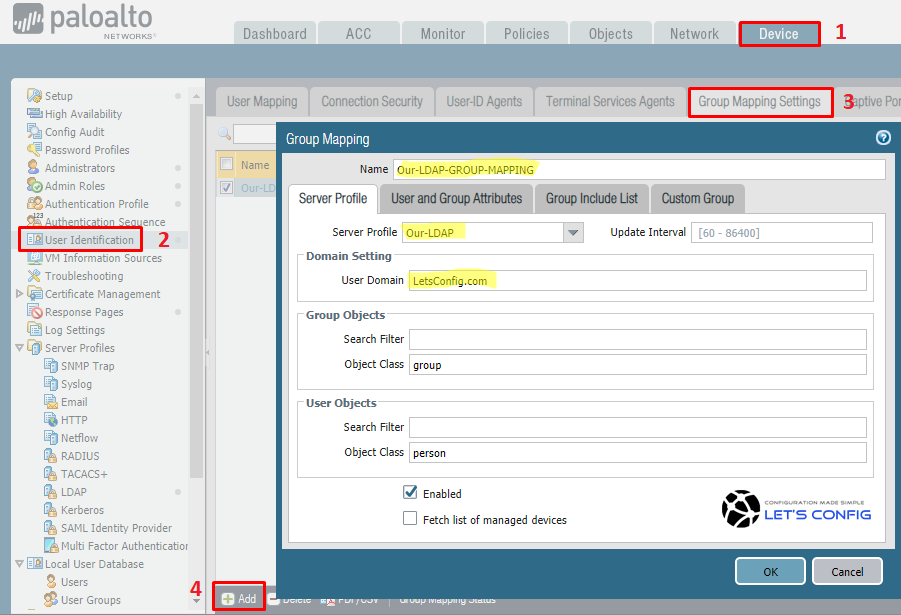
Next section is for Group Mapping configuration. Here, go to Device >> User Identification >> Group Mapping Settings.
You have to name the Group Mapping and add Server Profile. And, then add your User Domain name. In my case, the name of the Group Mapping is Our-LDAP-GROUP-MAPPING, and i select my Server Profile Our-LDAP from drop-down menu. AD domain is LetsConfig.com.
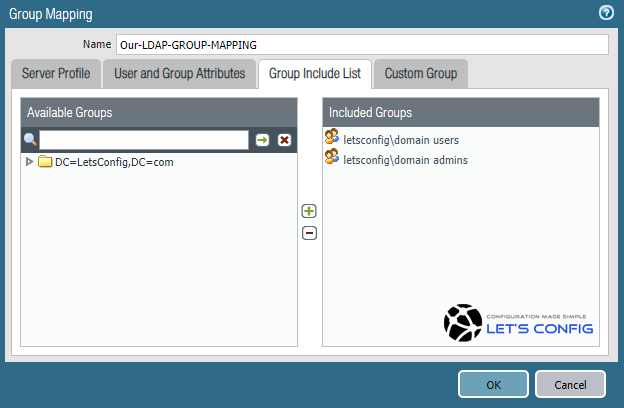
Then, from Group Include List, you need to include your desire group. In our LAB, its domain user and admins. Click OK to add.
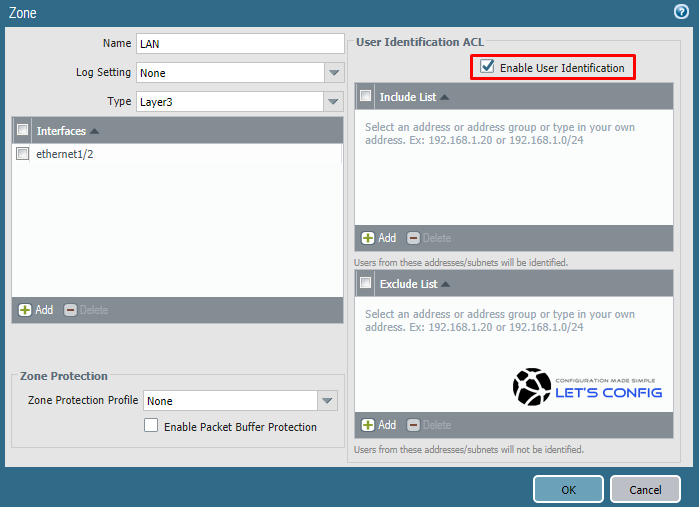
Enable User-ID on Zone
To enable user-id on zone, go to Network >> Zones and then click on your desire zone. In my case, i am going to enable on LAN zone, which is only zone for end user. Check the box on Enable User Identification just like below picture.
Finally, you need to commit all of your changes.
Verification:
Go to Monitor >> Logs >> Traffic. You will find output like below-

Below commands are also recommended to test.
show user group-mapping statistics
show user ip-user-mapping-mp all
You will find verification details for User-ID on Palo Alto from here.
Hi
Can you provide the detailed step for cloud identity engine configuration
How about redistribution?
Do you have any observation on redistribution?
Great explanation. Appreciated.
Thanks Sohail 🙂
HI Rajib,
Can you please share your policy rules where you called the domain users.
Thanks.
Whenever you are configuring USER-ID, you do not need to add any additional configuration in security policy.
However, you can call AD Users in security policies, if you want to have a rule for any specific AD users group.